TransformRay Control
User manual of the trinckle paramate GUI Controls API.
Introduction
The TransformRay control is a UI interface for trCAD ray probing. By incorporating this control into a web application, users receive immediate visual feedback for placement of geometry, interactive manipulation of rays, and targeted selection of specific rays. TransformRay control offers three primary use-cases, each providing interactive feedback when manipulating rays in a paramate environment.
1. Making a Ray Probe on the 3D Object
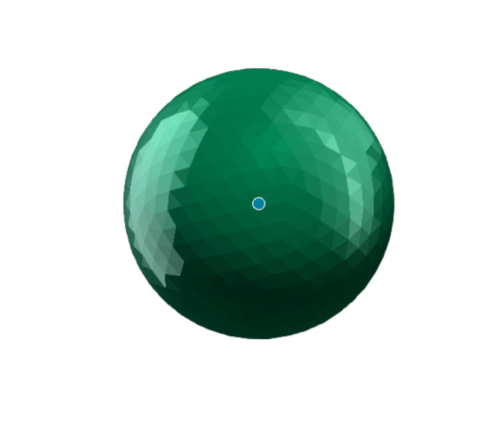
The TransformRay control allows users to perform ray probing on a 3D object. By directing a ray towards the object, the control sends to the paramate API request to check for intersections. If the probing condition is successful, and an intersection with the object occurs, the control generates a point on the screen corresponding to the intersection. This point can then be further manipulated by clicking and dragging.
This feature is particularly useful for applications such as placing geometry onto existing objects. Users can accurately position new elements by probing the target object's surface and obtaining the intersection point. They can then interactively drag and adjust the position of the newly placed geometry for precise alignment and customization.
2. Using Existing Rays for Manipulation
The TransformRay control also supports manipulating existing rays by clicking and dragging. This functionality is useful when the initial ray placement is known, but users need the flexibility to edit their positioning interactively.
With this capability, users can select a ray and drag it to a new location within the 3D space. This can be helpful for fine-tuning the placement of rays or adjusting their orientation in relation to other objects. By clicking and dragging existing rays, users can iteratively refine their positions until the desired arrangement is achieved.
3. Selecting Existing Rays
In certain scenarios, it may be necessary to select existing rays without allowing users to edit their placement. The TransformRay control caters to this requirement by enabling users to select rays by clicking on them, without the ability to drag or modify their positioning.
By simply clicking on a ray, users can trigger selection events or perform specific actions associated with the selected ray. This selective functionality is valuable for various applications, such as highlighting or manipulating specific rays within a collection.
Control Initialization
The TransformRay control can be initialized using the TransformRay constructor function. This function allows the initialization of TransformRay control with or without being bound to a paramate open parameter. When a paramate open parameter is specified, the control establishes a direct connection with the paramate server and enables real-time updates and interactions. For more information about these two types of initialization, see also GUI Controls Initialization.
The options object provides settings for customizing the behavior of the transformRay control. These settings include following optional configuration parameters: dragModeActive, connectLines, drawLabel, and labelText.
For the explanation of the options object's settings please consult TransformRay constructor function.
Below is the example that initializes TransformRay with default settings (e.g., custom settings are undefined) and with two open parameter strings.
Example
const transformRay = new ParamateControls.TransformRay(viewport, controls, undefined, 'main:userRayPosition', 'main:userRay');
In trCAD, open parameters can be defined like this:
Example
open ray userRay
{
  name  = "User-defined ray"
  descr = "Ray initialized with some initial ray.\n To be used by TransformPoint control"
  value =  ray(<[66.0,-327.0,-44.0]>, <[0.2, 1, 0.25]>)
}
get (userRay)

open vector userRayPosition
{
  name  = "User-defined position obtained from ray probing"
  descr = "Position initialized with some initial vector.\n To be used by TransformPoint control"
  value =  <[28.0, 0.20, 10.0]>
}
get (userRayPosition)
Single TransformRay instance with default settings. The open parameters are defined as a single vector and a single ray.
It is also possible to initialize TransformRay controls with open parameters defined as a list of vectors and a list of rays.
Note
In this situation, both open parameters should be defined as lists. Otherwise, the control will produce an error.
In the example below, TransformRay controls are initialized in the following way:
Example
const transformRays = new ParamateControls.TransformRay(viewport, controls, undefined, 'main:rayPositionList', 'main:rayList');
In trCAD, open parameters can be defined like this. Note that both lists are empty from the beginning:
Example
open ray rayList[]
{
  name  = "User-defined list of rays"
  descr = "Rays that are created on user click.\n To be used by TransformPoint control"
  value =   <ray>[]
}
get (rayList)

open vector rayPositionList[]
{
  name  = "User-defined list of positions obtained from ray probing"
  descr = "Positions created on user click.\n To be used by TransformPoint control"
  value =   <vector>[]
}
get (rayPositionList)
The function below demostrates, how a new ray can be added on user click. Each time a user click satisfies some condition, for example, hits the required geometry, a new ray will be created and sent to the trCAD system. This, in turn, will update both rayPositionList and rayList arrays.
Example
const addRay = () => {
  configurator.viewPort.cameraAutoPos = false;
  configurator.viewPort.viewportElement.style.cursor = "crosshair";
  configurator.viewPort.replaceViewportEvent(
    'mousedown', (e) => {
      // Get the ray and parse it
      const camRay = transformRays.getCameraRay(e);
      // Use a public function from TransformRay
      transformRays.addRay(camRay);
      configurator.viewPort.resetViewportEvent('mousedown');
      configurator.viewPort.viewportElement.style.cursor = "default";
    });
  }
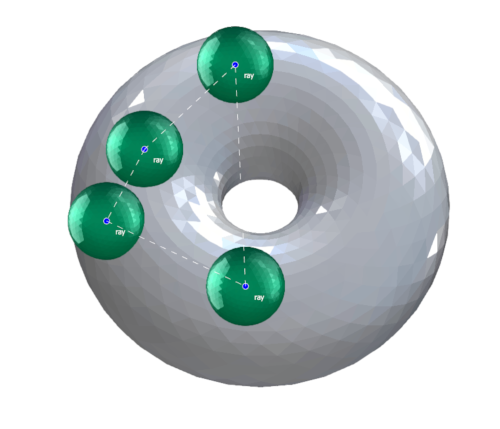
Single TransformRay instance with default settings. The open parameters are defined as a list of vectors and list of rays that are initially empty. When a user clicks the mouse and hits the geometry (plastic torus), a new ray and position vector are generated and pushed back to the lists. As a result, a new geometry is added into the scene (green sphere).
Look and Feel Customization
To modify the various visual aspects of the controls, such as fillStyle, strokeStyle, fillText, font, lineWidth, and more, users can create custom styling presets using the following setters:
- ref_pointStyles_setter - ref_fillStyles_setter - ref_fontStyles_setter - ref_lineStyles_setter
Each styling setter setups a list of styling presets confirming to the corresponding interface.
For example, to create a preset of styles for the point that would vary point radius, fill- and stroke color, line type and thickness (in case the points should be connected with the line), a user may create a following pointStyles setting object:
Example
// Initialize TransformRay object.
const transformRays = new ParamateControls.TransformRay(viewport, controls, { connectLines: true }, 'main:rayPositionList', 'main:rayList');

// Initialize a preset of 2 styles for the point
const pointStyles = [
  {
    radius: 5,
    strokeStyle: '#D1E8E2',
    fillStyle: '#A9D6E5',
    lineWidth: 1,
    lineDash: []
  },
  {
    radius: 7,
    strokeStyle: '#E2E2E2',
    fillStyle: '#19747E',
    lineWidth: 1,
    lineDash: []
  }
];


transformRays.pointStyles = pointStyles;
While pointStyles[0] styles a point in its non-selected state, pointStyles[1] styles a point in the selected state.
Next, to change a style for connecting line, the preset may look like this:
Example
// Initialize a preset of 1 style for a point
const lineStyles = [
  {
    strokeStyle: '#D1E8E2',
    lineWidth: 1,
    lineDash: [5, 5]
  },
];

transformRays.lineStyles = lineStyles;
The styling above will produce the following result:
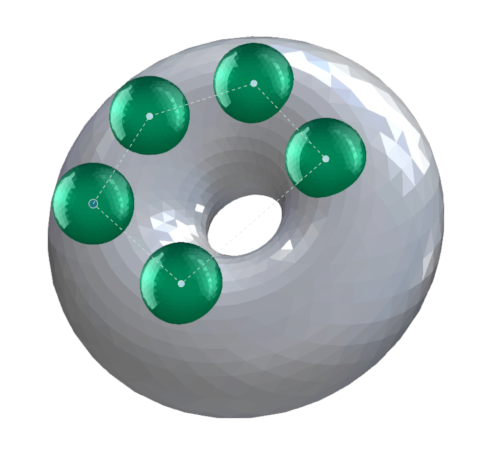
TransformRay control with custom settings (e.g., connected lines are drawn) and the styling applied to points in non-selected state (pointStyles[0]) and selected state (pointStyles[1]).
Default Key Events
| Event | Key | Behaviour |
| keydown | 'H' or 'h' | show / hide help window |
| keydown | ctrlKey or metaKey (on Mac OS) | select multiple ray points |